
tov-template
vite + vue3 + ts 开箱即用现代开发模板
## 特点 🐳
1. Vite 的
2. Vue3 的
3. 文件路由
4. 布局系统
5. Mock 支持
6. Api 自动引入
7. 组件自动引入
8. 图标自动引入
9. VueUse 支持
10. TypeScript 的
11. Windi CSS 的
12. 暗黑模式支持
13. SWR 请求支持
14. pinia 状态管理
15. pnpm 包管理器
16. 跳转进度条支持
17. Inspect 调试支持
18. 插件自动加载支持
19. Vitest 单元测试支持
20. 支持 Markdown 渲染
21. 路径别名 `~` 支持
22. 命令行自动创建与删除
23. i18n 国际化支持
24. 漂亮的 404 页 支持
25. tsx 支持
26. gzip 资源压缩支持
27. 环境变量配置支持
28. 统一的代码规范与风格支持
29. 生产环境自动移除开发日志
30. defineOptions 支持
## 克隆模板 🦕
1. Github
```shell
git clone git@github.com:dishait/tov-template.git
```
2. Gitee
```shell
git clone git@gitee.com:dishait/tov-template.git
```
3. degit
```shell
npx degit https://github.com/dishait/tov-template#main
```
4. 新的 `Github` 仓库 👉 [Use this template](https://github.com/dishait/tov-template/generate)
## `node` 版本推荐 🐎
因为该模板完全面向现代,所以推荐大家使用 `node` 当前的长期维护版本 `v16`, 大于 `v16.13.1` 即可。
## 使用 🐂
> 该模板不限定大家使用某一特定的包管理器,npm,yarn 和 pnpm 都行。同时注意 npm 的版本应该尽量的新。
强烈推荐大家使用更快更合理的 `pnpm` 包管理器 👉 [安装教程](https://pnpm.io/zh/installation)
1. 安装依赖
```shell
pnpm install
# 或者 npm install
# 或者 yarn
```
2. 开发
```shell
pnpm dev
# 或者 npm run dev
# 或者 yarn dev
# 开启 host
pnpm dev:host
# 或者 npm run dev:host
# 或者 yarn dev:host
# 自动打开浏览器
pnpm dev:open
# 或者 npm run dev:open
# 或者 yarn dev:open
```
3. 预览
```shell
pnpm preview
# 或者 npm run preview
# 或者 yarn preview
# 开启 host
pnpm preview:host
# 或者 npm run preview:host
# 或者 yarn preview:host
# 自动打开浏览器
pnpm preview:open
# 或者 npm run preview:open
# 或者 yarn preview:open
```
4. 打包
```shell
pnpm build
# 或者 npm run build
# 或者 yarn build
```
5. 单元测试
```shell
pnpm test
# 或者 npm run test
# 或者 yarn test
```
6. 单元测试报告生成
```shell
pnpm coverage
# 或者 npm run coverage
# 或者 yarn coverage
```
7. 样式报告预览
```shell
pnpm analysis
# 或者 npm run analysis
# 或者 yarn analysis
```
8. 样式报告打包
```shell
pnpm analysis:build
# 或者 npm run analysis:build
# 或者 yarn analysis:build
```
9. 类型检查
```shell
pnpm typecheck
# 或者 npm run typecheck
# 或者 yarn typecheck
```
10. 自动创建
```shell
pnpm auto:create
# 或者 npm run auto:create
# 或者 yarn auto:create
```
11. 自动移除
```shell
pnpm auto:remove
# 或者 npm run auto:remove
# 或者 yarn auto:remove
```
12. 依赖更新
```shell
# 安全版本更新
pnpm deps:fresh
# 或者 npm run deps:fresh
# 或者 yarn deps:fresh
# 主版本更新,可能是破坏性更新,谨慎使用,做好测试
pnpm deps:fresh:major
# 或者 npm run deps:fresh:major
# 或者 yarn deps:fresh:major
# 次版本更新,可能是破坏性更新,谨慎使用,做好测试
pnpm deps:fresh:minor
# 或者 npm run deps:fresh:minor
# 或者 yarn deps:fresh:minor
# 补丁版本更新
pnpm deps:fresh:patch
# 或者 npm run deps:fresh:patch
# 或者 yarn deps:fresh:patch
```
```shell
# 以上命令仅对包信息 package.json 进行写入,需要重新执行包安装命令
pnpm i
# 或者 npm i
# 或者 yarn
```
13. 代码规范校验
```shell
pnpm lint
# 或者 npm run lint
# 或者 yarn lint
# 校验时修复
pnpm lint:fix
# 或者 npm run lint:fix
# 或者 yarn lint:fix
```
## 动机 🐗
为什么要做这个 **模板** 呢?
1. 为下次开发节省浪费在配置上的时间
2. 结合主流插件整合现代开发架构,提高开发效率
## 使用场景 🐻
什么时候你应该用?
1. 不想浪费时间在项目配置上
2. 希望尝试用更现代的方式开发 `web` 应用,提高开发效率
## 启发 🐃
该模板受 **[vitesse](https://github.com/antfu/vitesse)** 启发,如果你有 `SSG` 的场景,那么推荐你始终使用 **[vitesse](https://github.com/antfu/vitesse)**。
## 组织 🦔
欢迎关注 **帝莎编程**
- [官网](http://dishaxy.dishait.cn/)
- [Gitee](https://gitee.com/dishait)
- [Github](https://github.com/dishait)
- [网易云课堂](https://study.163.com/provider/480000001892585/index.htm?share=2&shareId=480000001892585)
## 详情 🐳
### [1. Vite 的](https://cn.vitejs.dev/)
该模板采用 **[vite](https://cn.vitejs.dev/)** 作为构建工具,你可以在根目录下的 `vite.config.ts` 对项目的构建进行配置。
对于众多主流插件的引入和繁杂配置已经整合到根目录下的预设 `presets` 中,大多数情况下你是不需要重新对它们进行配置的。
### [2. Vue3 的](https://v3.cn.vuejs.org/)
### [3. 文件路由](https://github.com/posva/unplugin-vue-router)
目录结构即路由。
eg:
- `src/pages/index.vue` => `/`
- `src/pages/about.vue` => `/about`
- `src/pages/users/index.vue` => `/users`
- `src/pages/users/profile.vue` => `/users/profile`
- `src/pages/users/[id].vue` => `/users/:id`
- `src/pages/[user]/settings.vue` => `/:user/settings`
- `src/pages/[...notFound].vue` => 404 路由
具体可见 👉 [unplugin-vue-router](https://github.com/posva/unplugin-vue-router)
### [4. 布局系统](https://github.com/dishait/vite-plugin-vue-meta-layouts)
#### 默认布局
`src/layouts/default.vue` 将作为默认布局。
```html
我是默认布局
```
此时 `src/pages/index.vue`
```html
我是首页
```
路由到 `/`时,页面将渲染
```html
我是默认布局 我是首页
```
此时 `src/pages/about.vue`
```html
我是关于页
```
路由到 `/about` 时,页面将渲染
```html
我是默认布局 我是关于页
```
#### 非默认布局
随便创建一个 `src/layouts/custom.vue`
```html
我是非默认布局custom
```
此时 `src/pages/index.vue` 内
```html
我是首页
meta: layout: custom
```
此时路由到 `/`, 页面将渲染
```html
我是非默认布局custom 我是首页
```
具体可见 👉 [vite-plugin-vue-meta-layouts](https://github.com/dishait/vite-plugin-vue-meta-layouts)
### [5. Mock 支持](https://github.com/vbenjs/vite-plugin-mock)
在根目录下的 `mock` 目录下,可以在模块中导出默认的 `api` 资源。
例如 `mock/test.ts` 内导出
```ts
import { MockMethod } from 'vite-plugin-mock'
export default [
{
url: '/api/get',
method: 'get',
response: () => {
return {
code: 0,
data: {
name: 'vben',
},
}
},
},
] as MockMethod[]
```
在 `src` 中就可以进行模拟请求。
```html
data: {{data}}
loading: {{loading}}
error: {{error}}
```
这里用到 [vue-request](https://cn.attojs.org/) 去做请求,不过因为该 `mock` 拦截的是一整个接口,所以换成 `axios` 等请求库也是可以的。
更多 `mock` 设置可见 👉 [vite-plugin-mock](https://github.com/vbenjs/vite-plugin-mock)
### [6. Api 自动引入](https://github.com/antfu/unplugin-auto-import)
原本 `vue` 的 `api` 需要自行 `import`。
```ts
import { ref, computed } from 'vue'
const count = ref(0)
const doubled = computed(() => count.value * 2)
```
现在可以直接使用。
```ts
const count = ref(0)
const doubled = computed(() => count.value * 2)
```
而且上边的 `api` 是按需自动引入的。
目前模板支持自动引入 `api` 的库列表包括:
1. vue
2. pinia
3. vueuse
4. vue-i18n
5. vue-router
当然还有项目中的自动引入,只需要满足以下规范即可。
1. `src/composables` 的导出将被按需自动引入。
例如有个 `src/composables/foo.ts`
```ts
// default 导出
export default 1000
```
此时就不再需要 `import`了
```html
{{store.counter}}
```
1. `src/stores` 的导出将被按需自动引入。
例如有个 `src/stores/counterStore.ts`
```ts
// default 导出
export default defineStore('counter', {
state() {
return {
counter: 1,
}
},
actions: {
inc() {
this.counter++
},
},
})
```
此时就不再需要 `import`了
```html
{{store.counter}}
```
具体可见 👉 [unplugin-auto-import](https://github.com/antfu/unplugin-auto-import)。
### [7. 组件自动引入](https://github.com/antfu/unplugin-auto-import)
原来需要 `import`
```html
```
现在只要在 `src/components` 下定义的组件都将会按需引入,即 `import` 是不需要的。
```html
```
同时流行组件库自动引入也是支持的,例如 `Naive ui`。
只需安装依赖。
```shell
pnpm add naive-ui
# 或者 npm i naive-ui
# 或者 yarn add naive-ui
```
即可在模板中使用。
```html
Success
```
目前支持的组件库有:
[vant](https://github.com/youzan/vant)
[idux](https://github.com/IDuxFE/idux)
[devui](https://github.com/DevCloudFE/vue-devui)
[quasar](https://github.com/quasarframework/quasar)
[varlet](https://github.com/varletjs/varlet)
[inkline](https://github.com/inkline/inkline)
[vuetify](https://github.com/vuetifyjs/vuetify)
[naive-ui](https://github.com/TuSimple/naive-ui)
[primevue](https://github.com/primefaces/primevue)
[layui-vue](https://gitee.com/layui/layui-vue)
[view-design](https://iviewui.com/)
[arco-design](https://github.com/arco-design/arco-design)
[element-plus](https://github.com/element-plus/element-plus)
[ant-design-vue](https://github.com/vueComponent/ant-design-vue)
[@headlessui/vue](https://github.com/tailwindlabs/headlessui)
[tdesign-vue-next](https://github.com/Tencent/tdesign-vue-next)
[@vueuse/components](https://github.com/vueuse/vueuse/tree/main/packages/components)
具体可见 👉 [unplugin-vue-components](https://github.com/antfu/unplugin-vue-components)
### [8. 图标自动引入](https://github.com/antfu/unplugin-auto-import)
可前往 👉 [icones](https://icones.netlify.app/),随意选择点击进入其中一个图标库
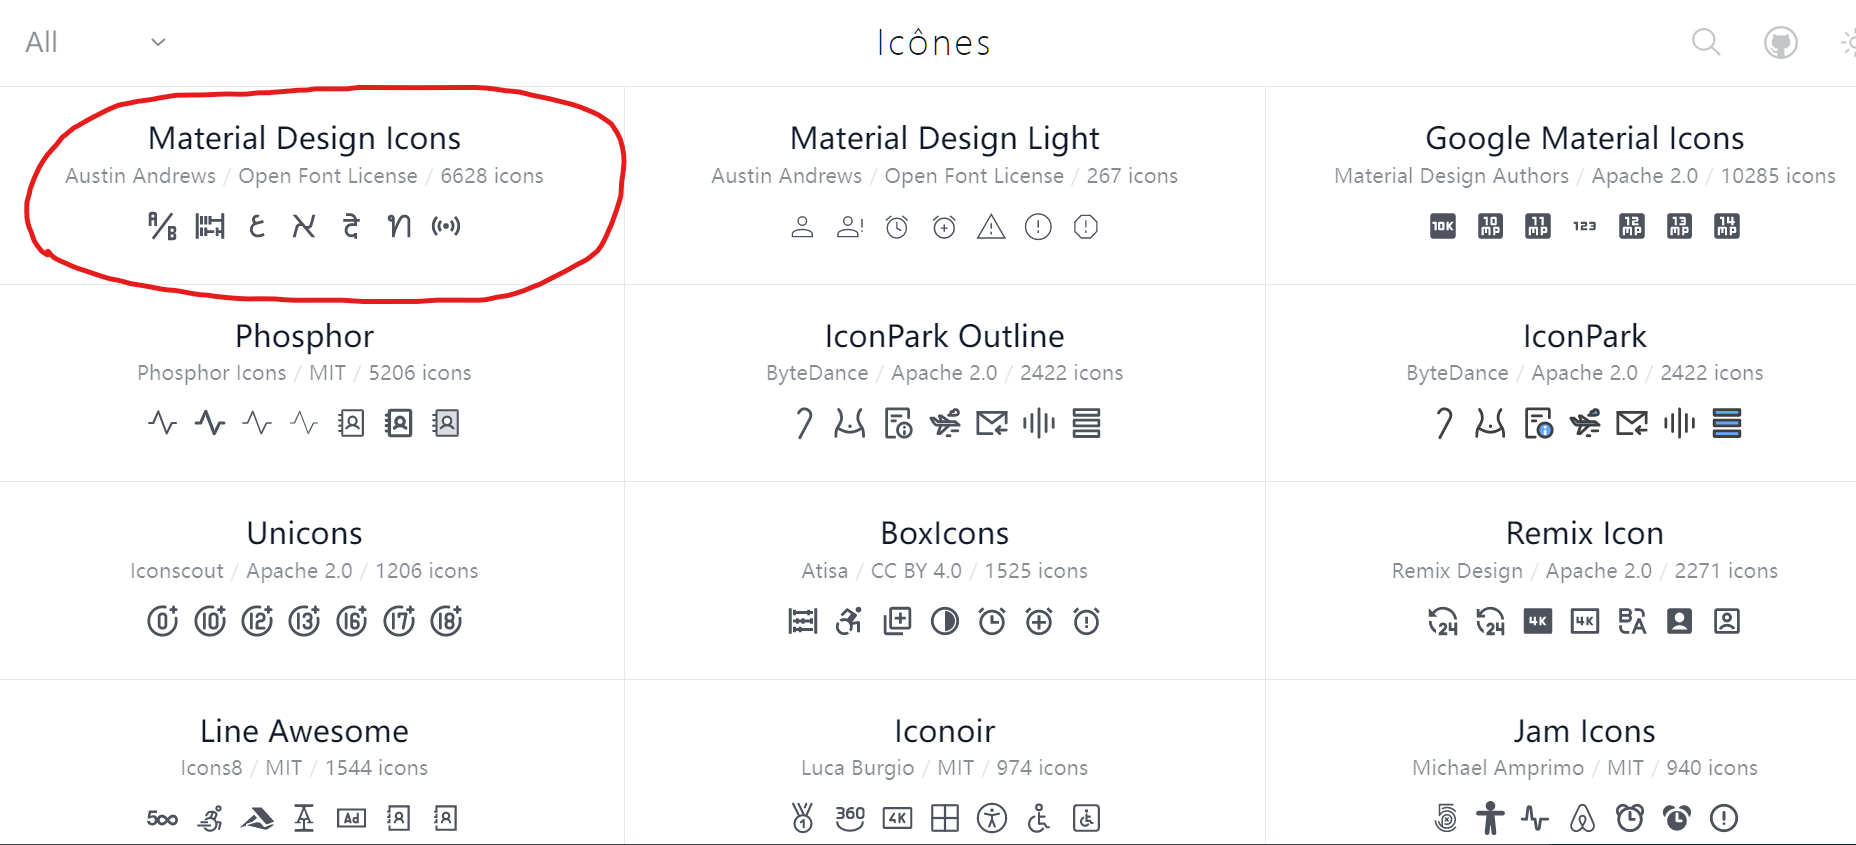
再点击选择其中一个喜欢的图标
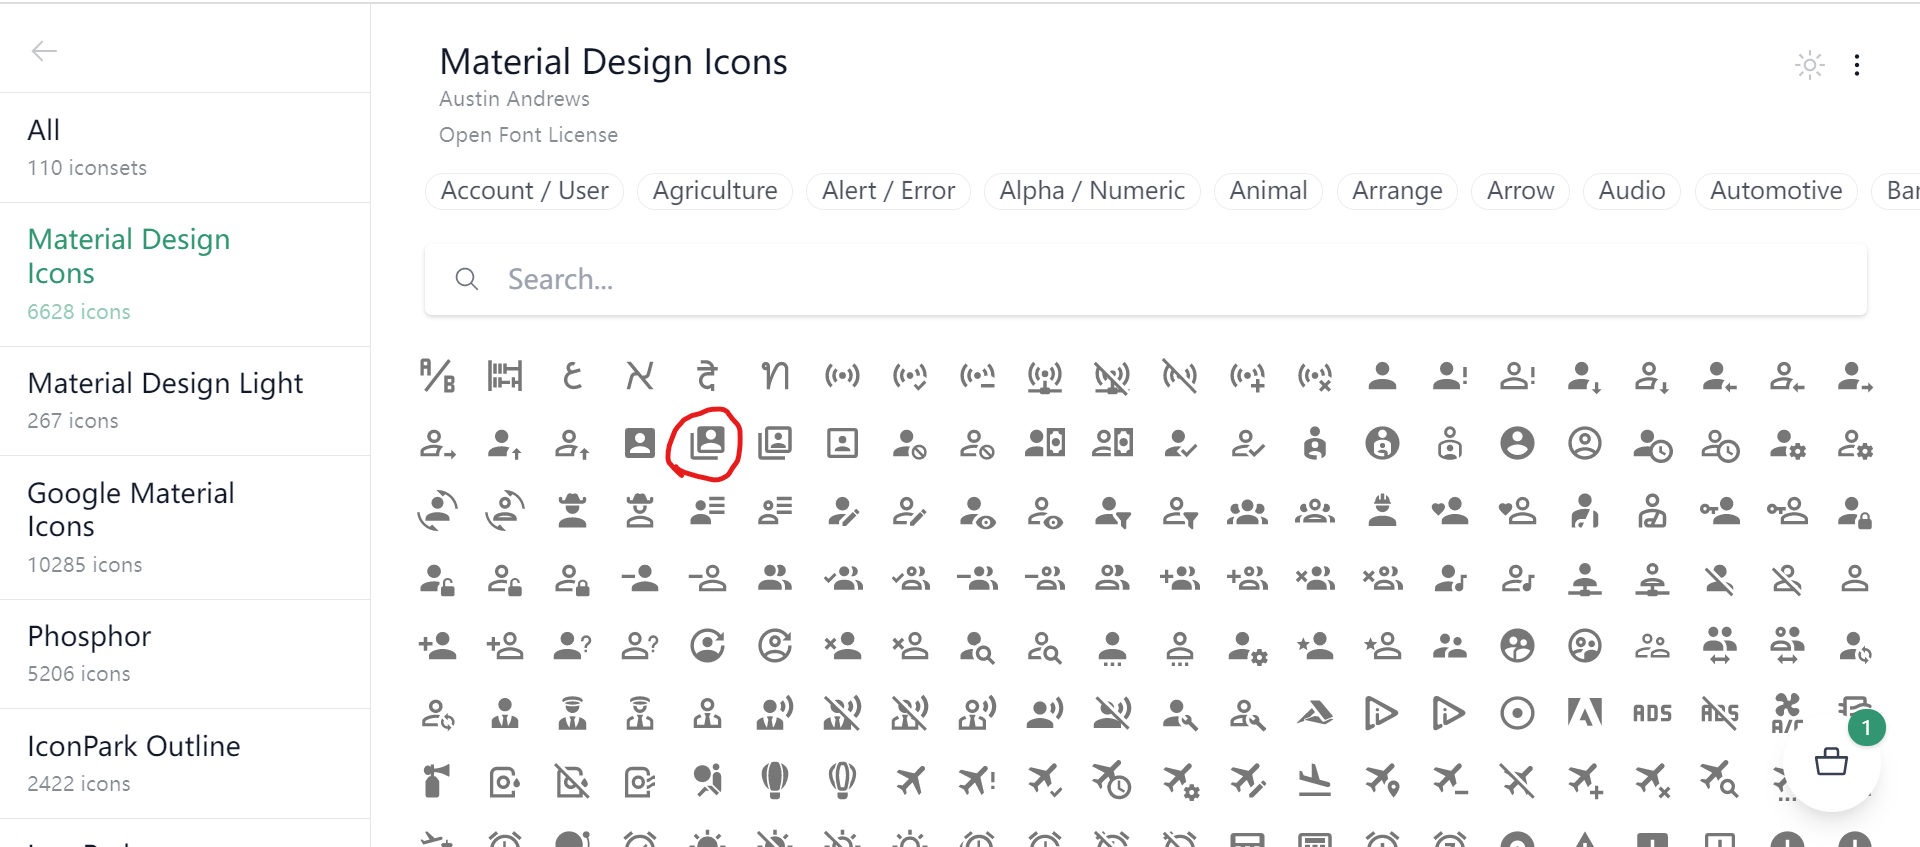
复制其名称
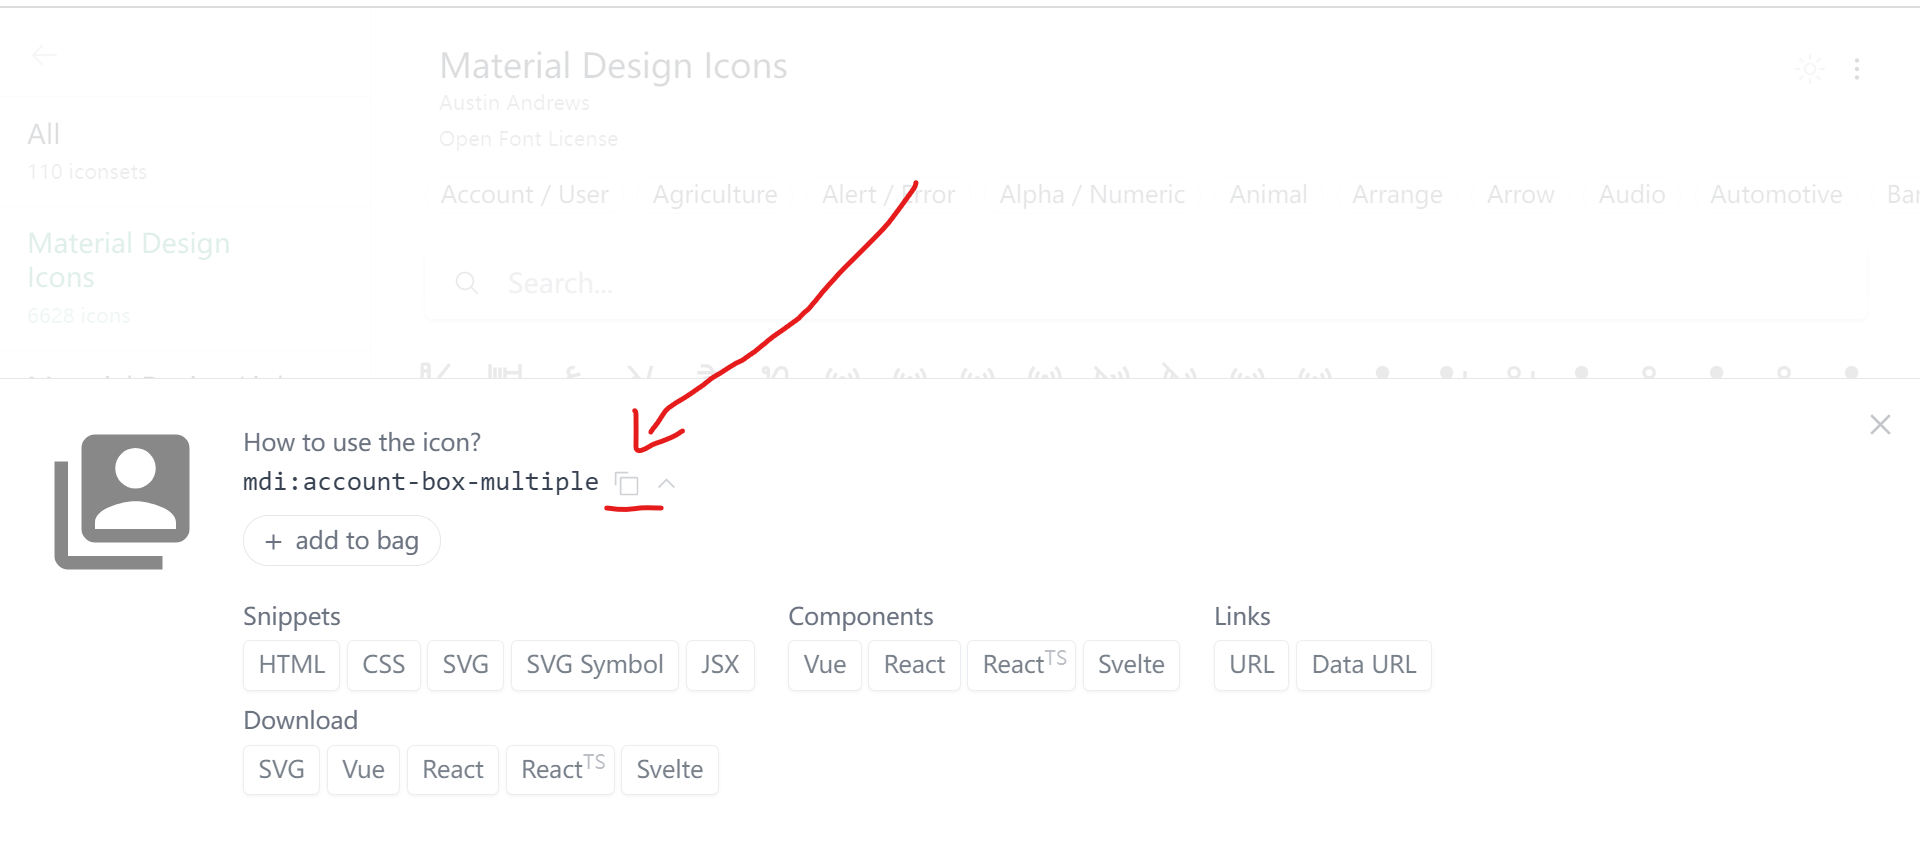
在模板中即可直接用组件的形式直接使用,注意加上前缀 `i-`。
```html
```
保存后等待自动下载该图标库后,就可以在页面中看到对应图标。
注意自动下载图标需要 `pnpm` 包管理器支持,如果你是其他包管理器需要手动安装图标集 👇👇👇
图标集名称为 `@iconify/` 加 `:` 前缀,例如上边的图标是 `mdi:account-box-multiple`,图标集名称就为 `@iconify/mdi`。
```shell
npm i @iconify/mdi -D
# 或者 yarn add @iconify/mdi -D
```
同时推荐你使用 `vscode` 插件 [Iconify IntelliSense](https://marketplace.visualstudio.com/items?itemName=antfu.iconify)。
该插件会在模板中显示图标的预览。就像这样 👇
```html
```
将在 `vscode` 中得到图标预览

具体可见 👉 [unplugin-icons](https://github.com/antfu/unplugin-icons)
### [9. VueUse 支持](https://vueuse.org/)
`VueUse` 是一个超级强的 `hooks` 库,例如你要获取鼠标位置,只需要这样 👇
```html
x坐标 {{x}}
y坐标 {{y}}
```
具体可见 👉 [VueUse](https://vueuse.org/)
### [10. TypeScript 的](https://www.tslang.cn/)
不需要重新配置,直接用 `ts` 书写就行了。
### [11. Windi CSS 的](https://cn.windicss.org/)
`Windi CSS` 是一个开发中速度更快的 `原子css` 库。
直接在模板中用就行了,不需要配置。
```html
我是红色背景的白色文本
```
上述模板将渲染红色背景白色的字。
同时支持 [属性化模式](https://cn.windicss.org/features/attributify.html#attributify-mode),即可以用简写。该功能默认关闭,可在 `windi.config.ts` 中 设置 `attributify` 为 `true` 开启。
```html
我是红色背景的白色文本
```
这在调整边距尺寸以及等方面可以减少代码量。
同时预设 [排版](https://cn.windicss.org/plugins/official/typography.html) 插件,解决简单的布局困难问题。
当然也支持 [可视化分析器](https://cn.windicss.org/features/analyzer.html) 生成 `原子css` 报告.
在终端中输入命令,即可看到报告
```shell
pnpm analysis
# 或者 npm run analysis
# 或者 yarn analysis
```
或者打包输出该报告
```shell
pnpm analysis:build
# 或者 npm run analysis:build
# 或者 yarn analysis:build
```
具体可见 👉 [Windi CSS](https://cn.windicss.org/)
### [12. 暗黑模式支持](https://cn.windicss.org/features/dark-mode.html#dark-mode)
暗黑模式由 `Windi CSS` 的 `暗黑模式` 和 `VueUse` 实现。
`src/composables` 目录用来存储 `composition-api` 模块。
该目录下预设了`useDarks` 模块,该模块导出 `isDark` 和 `toggleDark` 用来显示和切换暗黑模式。
```ts
// src/composables/useDarks.ts
// vueuse的 api 会自动按需引入,无需import
export const isDark = useDark()
export const toggleDark = useToggle(isDark)
export const useDarks = () => ({ isDark, toggleDark })
```
模板中即可直接用
```html
Hello,This is the tov template!!
light: {{ isDark }} click me!!
```
具体可见 👉 [暗黑模式](https://cn.windicss.org/features/dark-mode.html#dark-mode)
### [13. SWR 请求支持](https://cn.attojs.org/)
SWR 是更现代的请求方式,具体可见文章 👉 [SWR](https://zhuanlan.zhihu.com/p/89570321)。
而 [vue-request](https://cn.attojs.org/) 是一个 `SWR` 的 `Vue` 版本请求库。
你可以这样用,例如请求 `/api/test`
```html
data: {{data}}
error: {{error}}
loading: {{loading}}
```
所有基本的数据,状态和缓存都帮你搞定了,不需要重新封装。
具体可见 👉 [vue-request](https://cn.attojs.org/)
### [14. pinia 状态管理](https://pinia.vuejs.org/)
`pinia` 是下一代的状态管理库,比 `vuex` 更简单,`ts` 支持更好。
你可以在 `src/stores` 中进行状态的定义。
例如创建 `src/stores/counter.ts` 👇
```ts
// src/stores/counter.ts
import { defineStore } from 'pinia'
export const useCounterStore = defineStore('counter', {
state: () => {
return { count: 0 }
},
actions: {
inc() {
this.count++
},
},
})
```
定义完后在 `setup` 中直接使用即可
```html
```
### 22. 命令行自动创建与删除
只要输入 👇,即可创建一个标准的页面或组件
```shell
pnpm auto:create
# 或者 npm run auto:create
# 或者 yarn auto:create
```
当然也可以进行删除 👇
```shell
pnpm auto:remove
# 或者 npm run auto:remove
# 或者 yarn auto:remove
```
### [23. i18n 国际化支持](https://github.com/intlify/bundle-tools/tree/main/packages/vite-plugin-vue-i18n)
在日常的业务当中,可能会存在一些需要国际化的场景。那么只需要在根目录下的 `locales` 中定义不同语言的 `yml` 即可在项目中做到开箱即用的国际化支持。
比如 `locales/en.yml` 中用来定义需要国际化支持的英文内容。
```yml
# locales/en.yml
# English
index: index
about: about
not-found: Notfound
```
又如 `locales/zh-CN.yml` 中用来定义需要国际化支持的中文内容。
```yml
# locales/zh-CN.yml
# 中文
index: 主页
about: 关于
not-found: 未找到页面
```
此时在组件中即可这样用 👇
```html
language: {{ t('index') }} click me!!
```
更详细的说明可见用到的 `vite 插件` 👉 [@intlify/vite-plugin-vue-i18n](https://github.com/intlify/bundle-tools/tree/main/packages/vite-plugin-vue-i18n) 与 `vue插件` [vue-i18n](https://github.com/intlify/vue-i18n-next)。
另外 `yml` 是目前前端中流行的配置文件格式,语法可见阮一峰先生的 👉 [YAML 语言教程](http://www.ruanyifeng.com/blog/2016/07/yaml.html)。
`vscode` 插件推荐:
- 多合一的 `i18n` 支持 [i18n Ally](https://marketplace.visualstudio.com/items?itemName=Lokalise.i18n-ally)
### 24. 漂亮的 `404` 页支持
在日常业务中,当用户访问不存在的页面时,应该给到我们的用户一个不存在的信息提示,而这个提示的页面就是 `404` 页。
你可以随便访问一个不存在的页面,例如 `/bucunzai`
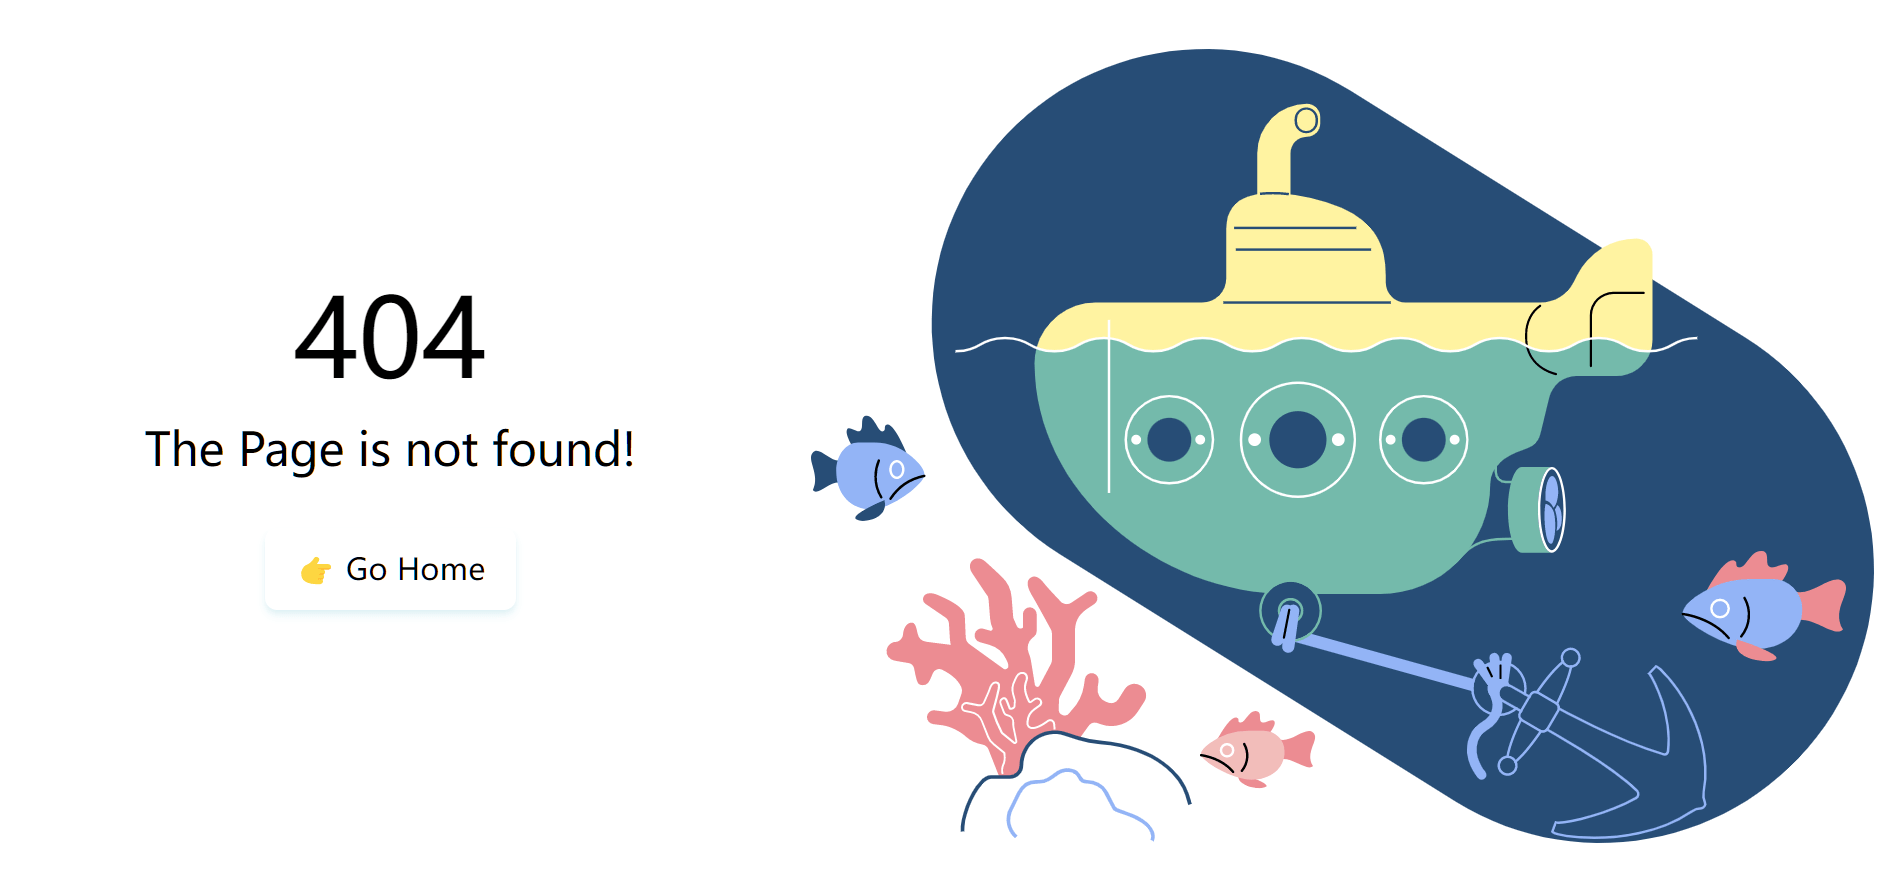
当然还有暗黑模式适应。
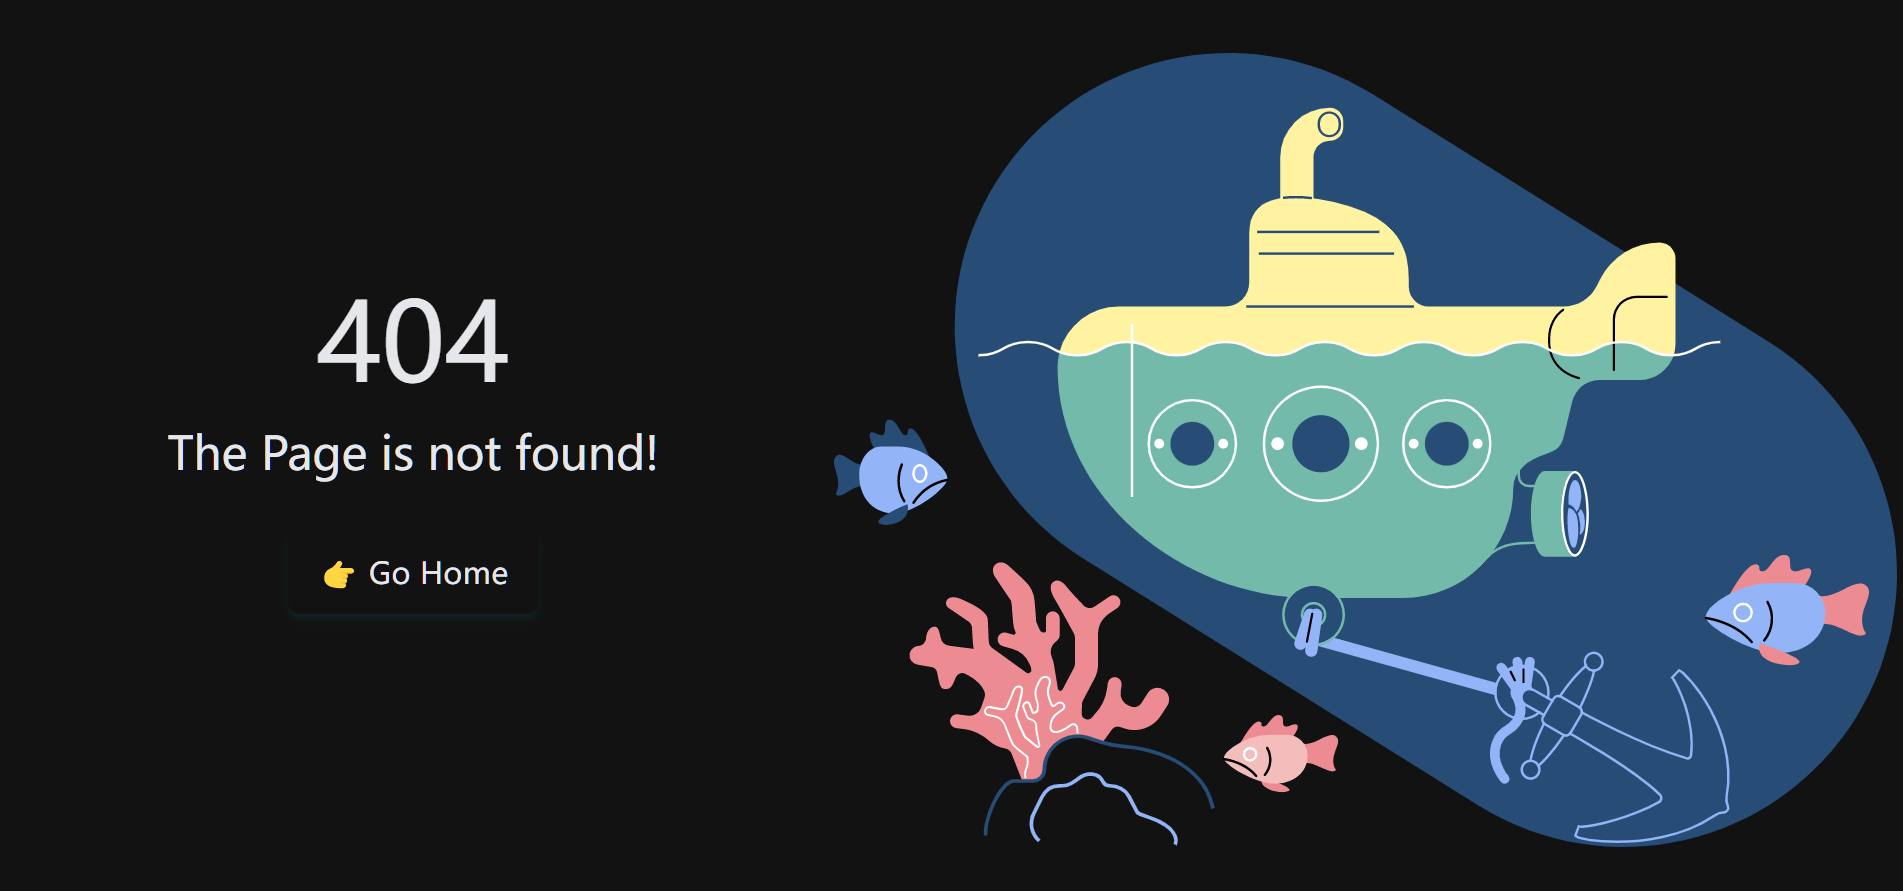
也支持简单的响应式适应。例如移动端浏览器上会有正确的显示。
当然如果这个 `404` 的封面不符合你的口味,那么可以在 `pages/[...notFound].vue` 中修改 `img` 标签的 `src`。默认是 `32.svg`,支持 `1 ~ 33` 的 `svg`。
例如,默认 👇
```html
 ```
修改 `/notFound/32.svg` 为 `/notFound/33.svg`
```html
```
修改 `/notFound/32.svg` 为 `/notFound/33.svg`
```html
 ```
即可切换封面为 👇

```
即可切换封面为 👇

### 25. [`tsx` 支持](https://github.com/vitejs/vite/tree/main/packages/plugin-vue-jsx)
只需要 `tsx` 文件放在 `src/components` 下,即可直接在模板中使用。
例如你有一个 `src/components/foo.tsx` 文件,那么即可直接在模板中使用。
```tsx
// src/components/foo.tsx
export default defineComponent({
render() {
return Test
},
})
```
```html
```
具体可见 👉 [@vitejs/plugin-vue-jsx](https://github.com/vitejs/vite/tree/main/packages/plugin-vue-jsx)
### 26. [`gzip` 资源压缩支持](https://github.com/vbenjs/vite-plugin-compression)
生产环境下开箱即用的 `gzip` 资源压缩,无需配置。
具体可见 👉 [vite-plugin-compression](https://github.com/vbenjs/vite-plugin-compression)
### 27. [环境变量配置支持](https://cn.vitejs.dev/guide/env-and-mode.html)
根目录下有三个环境变量配置文件 `.env`,`.env.development` 和 `.env.production` 用来对项目进行配置。
### 28. 统一的代码规范与风格支持
由 [eslint](https://github.com/eslint/eslint) 提供的代码规范校验,使用 [prettier](https://github.com/prettier/prettier) 统一代码风格。
由 [husky](https://github.com/typicode/husky) + [lint-staged](https://github.com/okonet/lint-staged) 提供的 `commit` 时校验。
### 29. [生产环境自动移除开发日志](https://github.com/dishait/vite-plugin-removelog)
生产环境下 `console.log`,`console.warn` 与 `console.error` 等日志会被自动移除掉,以避免开发时日志的泄漏。
具体可见 👉 [vite-plugin-removelog](https://github.com/dishait/vite-plugin-removelog)
### 30. [defineOptions 支持](https://github.com/sxzz/unplugin-vue-macros/blob/main/README-zh-CN.md)
```html
```
具体可见 👉 [unplugin-vue-macros](https://github.com/sxzz/unplugin-vue-macros/blob/main/README-zh-CN.md)
## License
Made with [markthree](./LICENSE)
Published under [MIT License](./LICENSE).